
I spent a working week running Gemini inside Google Docs on real drafts instead of a demo file. The short version is this: the panel on the right stops being a novelty once you stop treating it as a chatbot and start handing it specific jobs. The three it handled best were tightening messy paragraphs, dropping an illustration straight into a draft, and pulling a long section down to a few lines a reader can scan.
Rather than describe the features in the abstract, this guide reviews each one the way I actually used it. Every section shows what I typed, the output that came back, a plain list of what I liked and did not like, and a short record of how the test went. If you only read the boxes, you still get the verdict.
Before you start Open any Google Doc, then click the sparkle icon at the top right to open the Gemini panel. Gemini reads the document you have open, so the sharper your draft, the more useful its replies. Brief it the way you would brief a colleague: short, direct, one task at a time. |
What Gemini Actually Does in a Doc
My first move was to ask the panel to describe its own scope, to see whether its answer matched what it could really do. I typed "What can Gemini do in Google Docs?" and it listed the same handful of jobs I ended up relying on all week: generating and refining content, summarizing, and building first drafts from a short prompt.
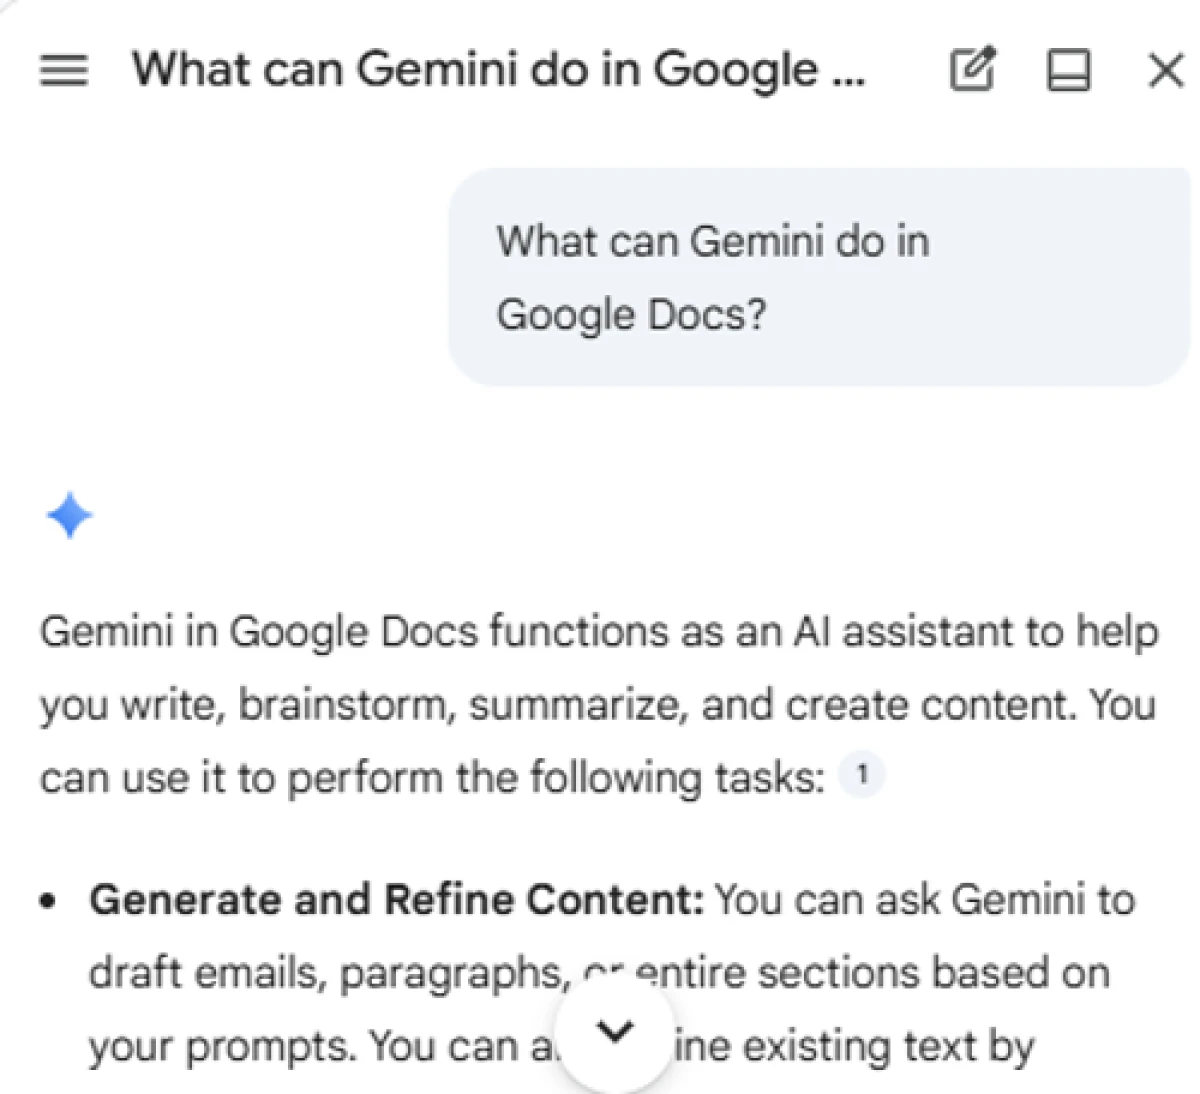
Asking Gemini to describe its own capabilities inside the document
The reply is accurate rather than inflated. It frames itself as a writing assistant that works on the text in front of it, not a search engine bolted onto the page. That distinction shaped everything that followed, because the strongest results came when I pointed it at content already in the doc rather than asking it to invent things from nothing.
1. Refining Content That Already Exists
This is the task I reached for most. I had a draft section titled "What Makes an AI Tool Worth Switching To?" with two paragraphs that said the right thing in a clumsy way. Rather than rewrite them by hand, I selected the text and gave the panel one instruction.
What I typed
"Refine this content." No style notes, no word count, no tone instruction. I wanted to see what it did on its own before I started steering it.
What came back
Gemini returned a tracked-style view: the old wording struck through in red, the replacement in blue, so I could read both versions before accepting anything.
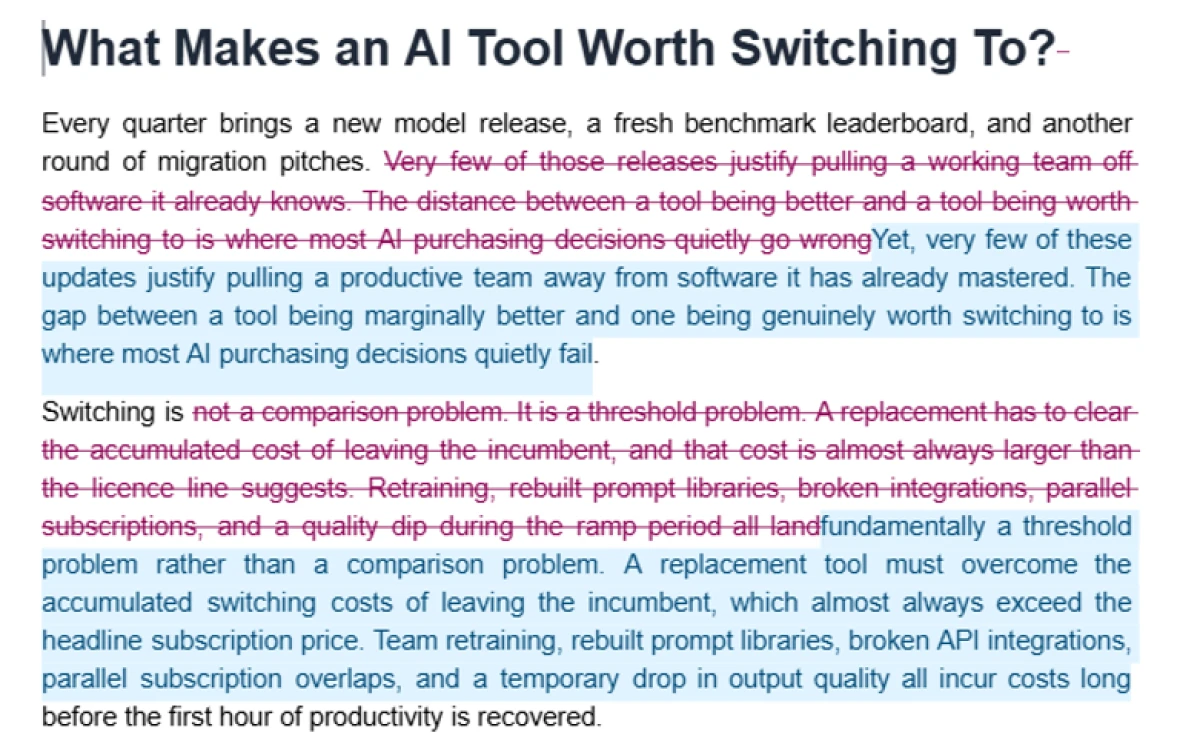
The original wording struck through in red, with Gemini’s rewrite in blue
It kept my meaning intact while cleaning up the delivery. The clumsy line about the gap between a tool being better and being worth switching to survived, but read cleanly. A vague sentence about switching being "a threshold problem" turned concrete, spelling out the retraining, rebuilt prompt libraries, broken integrations, and subscription overlaps that make up the real cost.
What I liked and what I did not
What I liked ✓ Shows changes instead of applying them, so I stayed in control. ✓ Preserved my meaning and did not invent new claims. ✓ Turned vague phrasing into concrete, specific wording. | What I did not like ✗ Softened one line I preferred in the original. ✗ Stacking several asks into one prompt weakened the result. ✗ No slider for how aggressive the rewrite should be. |
How to refine your own paragraph
Four steps 1. Select the text you want to improve, or place your cursor inside it. 2. Open the Gemini panel and type a short instruction such as "refine this content" or "tighten this and cut repetition". 3. Read the struck-through original against the suggested version before deciding. 4. Accept the whole rewrite, or copy only the lines stronger than yours. |
The record Prompt used: "Refine this content" Result: Two clumsy paragraphs rewritten cleaner, meaning intact Time saved: A manual rewrite pass, roughly ten minutes on this section Verdict: The feature I used most. One clear instruction beats a stacked one every time. |
2. Generating an Image Without Leaving the Draft
The section above needed a visual to carry the idea of weighing a new tool against the cost of switching. Normally that means opening a separate design tool, exporting, and dragging a file back in. Inside Docs I asked for it directly.
What I typed

"Create an image in the introductory section." I left the subject open on purpose, because the panel already had the surrounding text and I wanted to see whether it would read the context.
What came back
It did read the context. Gemini produced a labelled diagram built around the exact argument in the draft: an incumbent tool on one side loaded with switching friction, a new challenger on the other with its capability gains, and a balance in the middle weighing the two.
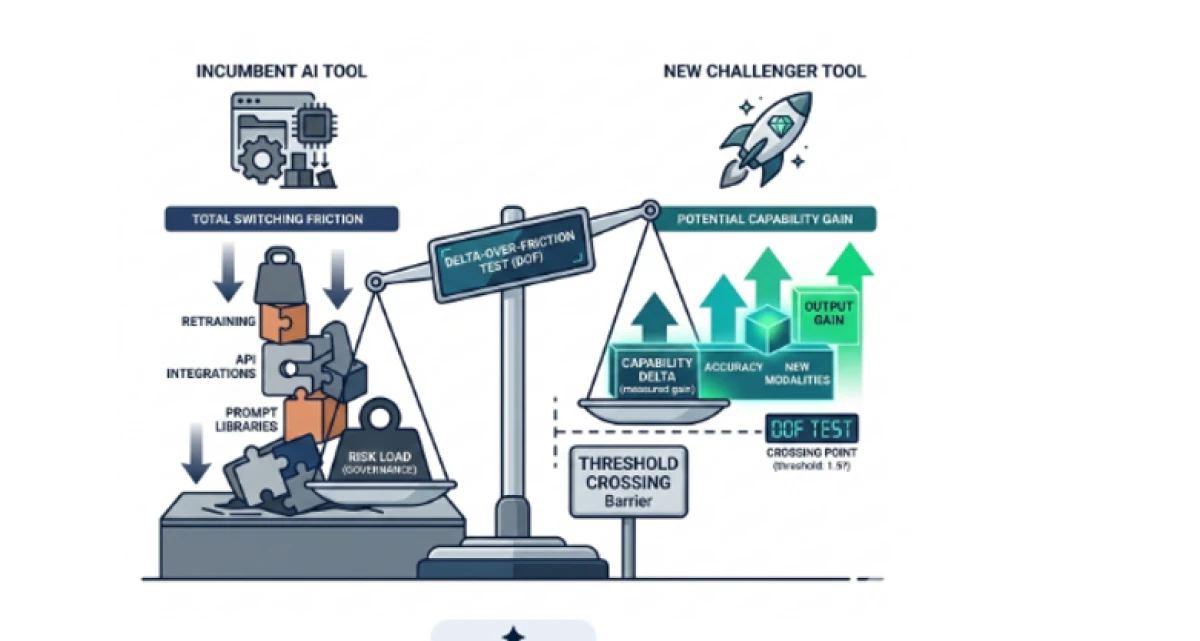
The diagram Gemini generated, built from the surrounding text in the draft
This surprised me most. I expected a generic stock-style graphic. Instead it pulled the specific vocabulary out of my paragraphs, retraining, API integrations, prompt libraries, risk load, capability delta, and arranged them into a scale-and-threshold visual that matched the point I was making.
What I liked and what I did not
What I liked ✓ Read the surrounding text and used my actual vocabulary. ✓ No round trip to a separate design tool. ✓ Strong enough to use as a first-pass draft visual in position. | What I did not like ✗ Not finished brand-quality design out of the box. ✗ A one-line prompt gave a busier layout than a detailed one. ✗ Fine control over labels and style still needs reprompting. |
How to generate an image in place
Four steps 5. Place your cursor where you want the image to sit in the document. 6. Describe what you want. Naming the section lets it borrow context from nearby text. 7. Wait for the preview, then insert it if it fits, or reprompt with a more specific description. 8. Treat the output as a strong draft visual, not a final asset, and refine the prompt to steer style and labels. |
The record Prompt used: "Create an image in the introductory section" Result: A labelled scale-and-threshold diagram matching the draft Time saved: A full round trip to a design app, export, and reimport Verdict: Best for first-pass illustrations. Name the elements when you want tighter control. |
3. Summarizing a Long Section Into Something Scannable
By the end of the draft I had a dense block of argument that a busy reader would skip. I wanted a short, scannable version to sit near the top as a takeaway. One instruction handled it.
What I typed
"Summarize it." With the section open, the panel knew what "it" referred to and worked on the content in front of it.
What came back
Gemini condensed several paragraphs into two clean bullet points, each with a bold lead-in and a one-sentence explanation.
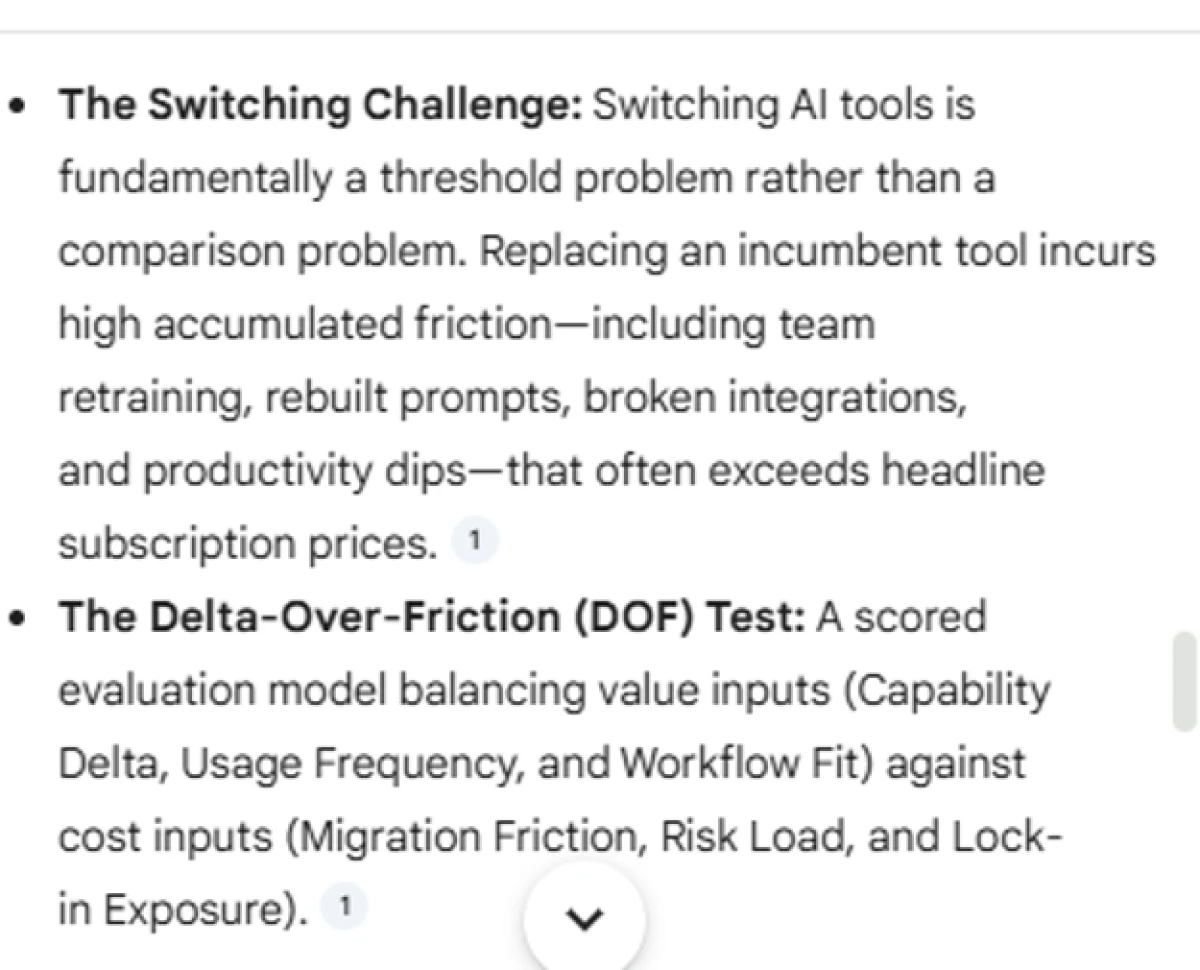
A multi-paragraph section reduced to two labelled bullet points
It did not just shorten the text, it reorganized it. The two ideas that mattered, the switching challenge framed as a threshold rather than a comparison, and the scored model for weighing value against cost, became the two headline bullets. Each kept the numbers and named components from the original instead of flattening them into generic phrasing.
What I liked and what I did not
What I liked ✓ Reorganized by importance, not just trimmed length. ✓ Kept the specific numbers and named components. ✓ Knew what "it" meant from the open section, no pasting needed. | What I did not like ✗ A bare "summarize this" gave looser results than a shaped ask. ✗ Whole-document summaries drifted; section by section stayed sharp. ✗ Bullet count was its choice unless I specified one. |
How to summarize your own section
Four steps 9. Open or scroll to the section you want condensed so Gemini has it in view. 10. Type "summarize it", or ask for a shape such as "summarize this as three bullet points". 11. Copy the summary to wherever it belongs, often the top of the document as a takeaway box. 12. For long documents, summarize section by section rather than the whole file at once. |
The record Prompt used: "Summarize it" Result: A multi-paragraph section cut to two labelled bullets Time saved: The work of writing a takeaway box from scratch Verdict: The quiet workhorse. Ask for a specific format and it gets even more useful. |
Putting the Three Together
Used on their own, each feature is handy. Used in sequence on a single draft, they change how the work flows. My actual order on this document was: draft roughly by hand, refine the weak paragraphs, generate an illustration for the section that needed one, then summarize the finished argument into a takeaway at the top. Three tasks that would normally span a writing tool, a design tool, and a second editing pass, all inside one document.
If you take one habit from this review, make it the one-job-per-prompt rule. Gemini inside Docs rewards a clear, single instruction and gets vague when you stack three asks into one line. Point it at text that already exists, tell it the single thing you want done, and read what it suggests before you accept.
The overall verdict
The record Strongest feature: Refining existing paragraphs, for the show-before-apply control Biggest surprise: Image generation reading the draft and reusing my vocabulary Most used: Summarizing, section by section Main limitation: Vague or stacked prompts; it needs one clear job at a time Would I keep using it: Yes, as a working assistant on drafts, not as a one-click finisher |
The quick reference
Keep this handy Refine: select text, type "refine this content", read the red-and-blue comparison, accept what is stronger. Generate an image: place the cursor, describe the visual or name the section, insert or reprompt. Summarize: open the section, type "summarize it" or ask for a set number of bullets, then place the result. Golden rule: one clear job per prompt, aimed at content Gemini can already see. |

Ethan Mitchell is a technology writer at TechJox, specializing in artificial intelligence, cybersecurity, SaaS platforms, software applications, and digital automation. His writing covers AI tools, data privacy, emerging technologies, and software reviews, with a focus on practical insights, clear explanations, and helping readers make informed technology decisions.
Discussion (0)
You need a free TechJox account to join the discussion and report scams you spot.